
In Expert Mode this menu option has the same function as the “Optimize” button. Namely, opening the Optimizer user interface…
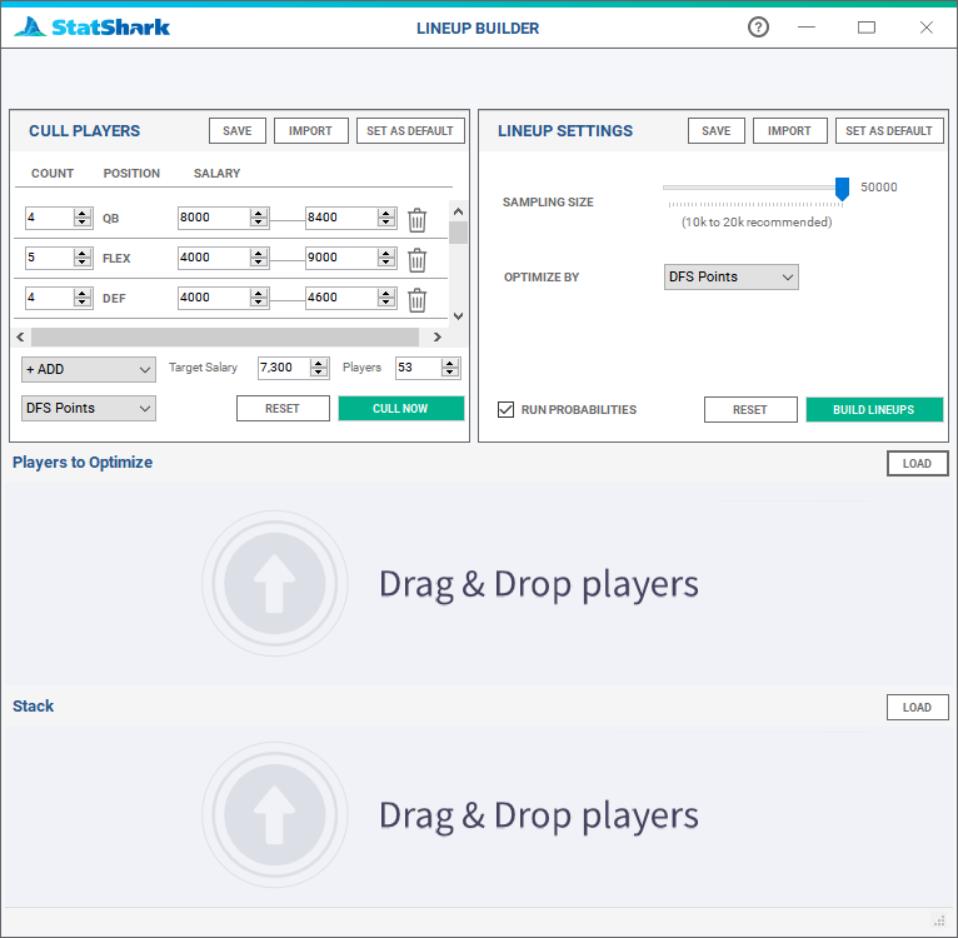
The optimizer has three primary components as shown above:
1. The Player Culling Settings
2. The Optimization Settings, and
3. The Player Selection and Stacking Areas
Player Culling Settings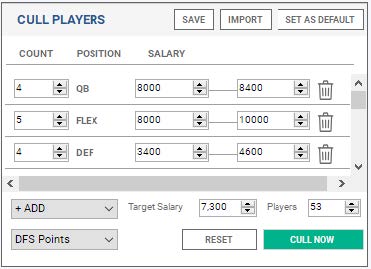
Save: Save the settings you have created to retrieve at some later time.
Import: Open and initiate settings that you have previously saved.
Set As Default: This will save your current settings as the default settings that will be used in Full Auto Mode.
+Add: Allows you to add a new salary/player-count tier for a given position.
Cull By: (the drop-down box. See the lower left of image where it says “DFS Points”) Select the metric by which to cull. The Auto Culler will find the best players, based upon the chosen metric, within each salary bucket. Examples would be, historical DFS Points, Points Per Salary, Time on Court, etc.
Reset: Delete your current setting allowing you to start over again.
Cull Now: Execute the settings you have created. Once you click this button, based upon your settings you will see the “Players To Optimize” area fill-up with those players chosen by the Auto Culler.
StatShark has an automated culling feature if you should elect to use it. The default settings of the automated culling feature is used in the Full Auto mode of creating lineups. The automated culling feature picks players based upon your preferences, so that you don’t have to look through every player and consider cost vs. performance. Using auto culling does not preclude you from also manually picking your favorite players. As such, you can manually pick your favorite players and then have auto culling fill in the rest.
The premise behind culling is that you can only have so many top-tiered, expensive players in a lineup before burning though your salary cap. There are multiple ways to address this issue. Some people like to have as many very expensive payers as possible and then fill the remaining salary cap with dirt-cheap players. Other’s prefer a more balanced approach hoping to capitalize on overall performance per salary cost (i.e. Points Per Salary).
The other issue users struggle with in this puzzle is, how do you ensure you are getting the best players, in terms of performance, for each dollar you spend? Auto culling takes care of all of these dimensions for you so that you don’t have to spend hours working on picking your players.
Auto culling allows you to set salary tiers for each position and then determine how many players you want to have placed into the optimizer at that salary tier. So, for example, in football, you may want only expensive quarterbacks, so, you may set only one tier for QBs where you tell the auto culling feature to provide the top six QBs having a salary range between $8,000 and $10,000. As the Auto Culler goes through the QBs it will first find the #1 QB within that salary range, it will then circle back and find the second best, and so on.
The concept of “best” is based upon the metric you have chosen. The image above shows that DFS Points was chosen (see lower left corner). You can however choose other measures, such as rank, points per salary, etc. Now realize, as the Auto Culling feature goes through this process, it is also looking to meet your other overall criteria of total average salary across all chosen players and the total number of players you are looking to add to the optimizer. These two metrics are also important for their own reasons. If you have tried to force the Auto Culler to pick only expensive players, your optimizations would typically fail to generate lineups or, the quality of your lineups would be degraded because you will only be able to create a limited number of lineups that meet the salary cap. Additionally, having too many or two few players in the optimizer will either reduce the number of possible combinations (not good) or provide for so many possible combinations that you’ll end-up with meaningless lineups. These two settings ensure you are giving the optimizer the number of users needed to make the best possible number of lineups within the salary cap requirement.
In our experience, we have found that an average salary about 20% greater than the mandatory average for a single lineup to work well. So, for example, a nine-player lineup with a $60,000 salary cap requires an average salary of $6,666. Thus, filling the optimizer with players having an average of roughly $7,200 to $7,800 is a decent strategy. But play with it and see what works best for you. Remember, you can always add players manually too.
Optimization Settings
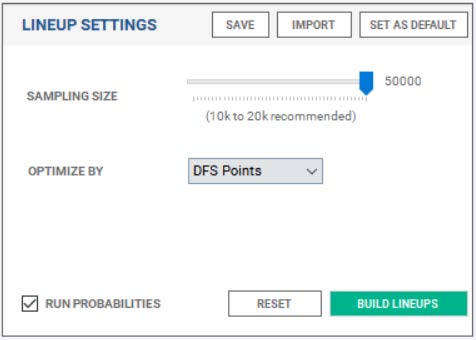
Save: Save the settings you have created to retrieve at some later time.
Import: Open and initiate settings that you have previously saved.
Set as Default: This will save your current settings as the default settings that will be used in Full Auto Mode.
Sampling Size: How many valid lineups would you like to have returned to you. The larger the number you pick, the longer the process will take.
Optimize By: This allows you to choose the metric you find to be most important in terms of building and sorting lineups. While most people will use historical DFS Points, other viable metrics, such as average Time on Court (for NBA) or average Player Rank, are also available.
The lineup optimization process also uses preferred performance metrics, such as projected DFS points or historical overperformance, to build your lineups. However, unlike player filtering and culling, this process is done at the lineup level. In other words, calculating the total or average of the chosen metric across all players within each produced lineup.
As can be seen in the Lineup Settings window, you may also choose the number of lineups you would like to have produced.
People often ask, “why would I want to generate 20,000 or 50,000 lineups”? The answer is rather straight forward. Let’s say you wanted to enter 10 lineups and thus only generated 10 lineups. If, based upon the number of players you have chosen, you can generate 2,000,000 viable lineups, the chances of the first 10 lineups being good are very slim compared to generating 20,000 lineups and then selecting the 10 having the highest probability of winning.
Please Note: depending upon the number or players, and the cost of those players, there may be less viable lineups than you have chosen to have returned to you. In such a case, StatShark will return to you 100% of the viable lineups that were generated.
Players to Optimize and Players to Stack
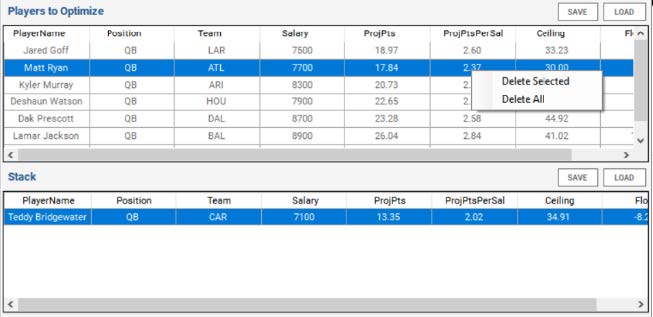
The Player and Stack selection boxes provide an area where you can review and manipulated the players your have selected, or stacked, for optimization.
Players can be added to these two containers from the Home Screen or by running the Auto Culling function. From the Home Screen, you add players by clicking and dragging players and/or right clicking on players and selecting to “Add to Optimizer” or “Add to Stack”.
Players can be removed from either container by the same method; simply right click and select “Deleted Selected” or “Delete All”.